# How to Install Fuji Xerox DocuCentre-V 2060 Driver
Canonical: https://snipgeek.com/blog/install-fuji-xerox-docucentre-v2060-driver
Locale: en
Description: A complete guide to installing and configuring the Fuji Xerox DocuCentre-V 2060 printer driver on a Windows network.
Date: 2026-02-20
Updated:
Category: Tutorial
Tags: windows, printer, driver, fuji-xerox
JSON: https://snipgeek.com/api/posts/install-fuji-xerox-docucentre-v2060-driver?locale=en
---
Installing a multifunction printer like the Fuji Xerox DocuCentre-V 2060 on an office network can sometimes be a challenge, especially in ensuring a smooth connection between the laptop and the printer. This guide will walk you through every step, from downloading the driver to IP configuration, to get your printer ready to use.
---
## Step 1: Download the Correct Driver
The first step is to ensure you have the right driver file. We have provided the PCL 6 driver, which is the most common and compatible driver for most printing needs.
> **Important:** We have provided the driver file in `.iso` format below to make it easy for you to follow this tutorial. However, as a best security practice, we highly recommend always downloading drivers directly from the manufacturer's official website whenever possible.
After the file is downloaded, right-click the `.iso` file and select **Mount**. This will create a virtual drive in File Explorer containing the installation files.
---
## Step 2: Configure a Static IP on the Printer
To ensure your laptop can always find the printer on the network, it's important to set a static IP address on the printer.
1. Access the admin menu on the printer and navigate to the network settings. This is usually under the **Connectivity & Network Setup > Protocol Settings** menu.
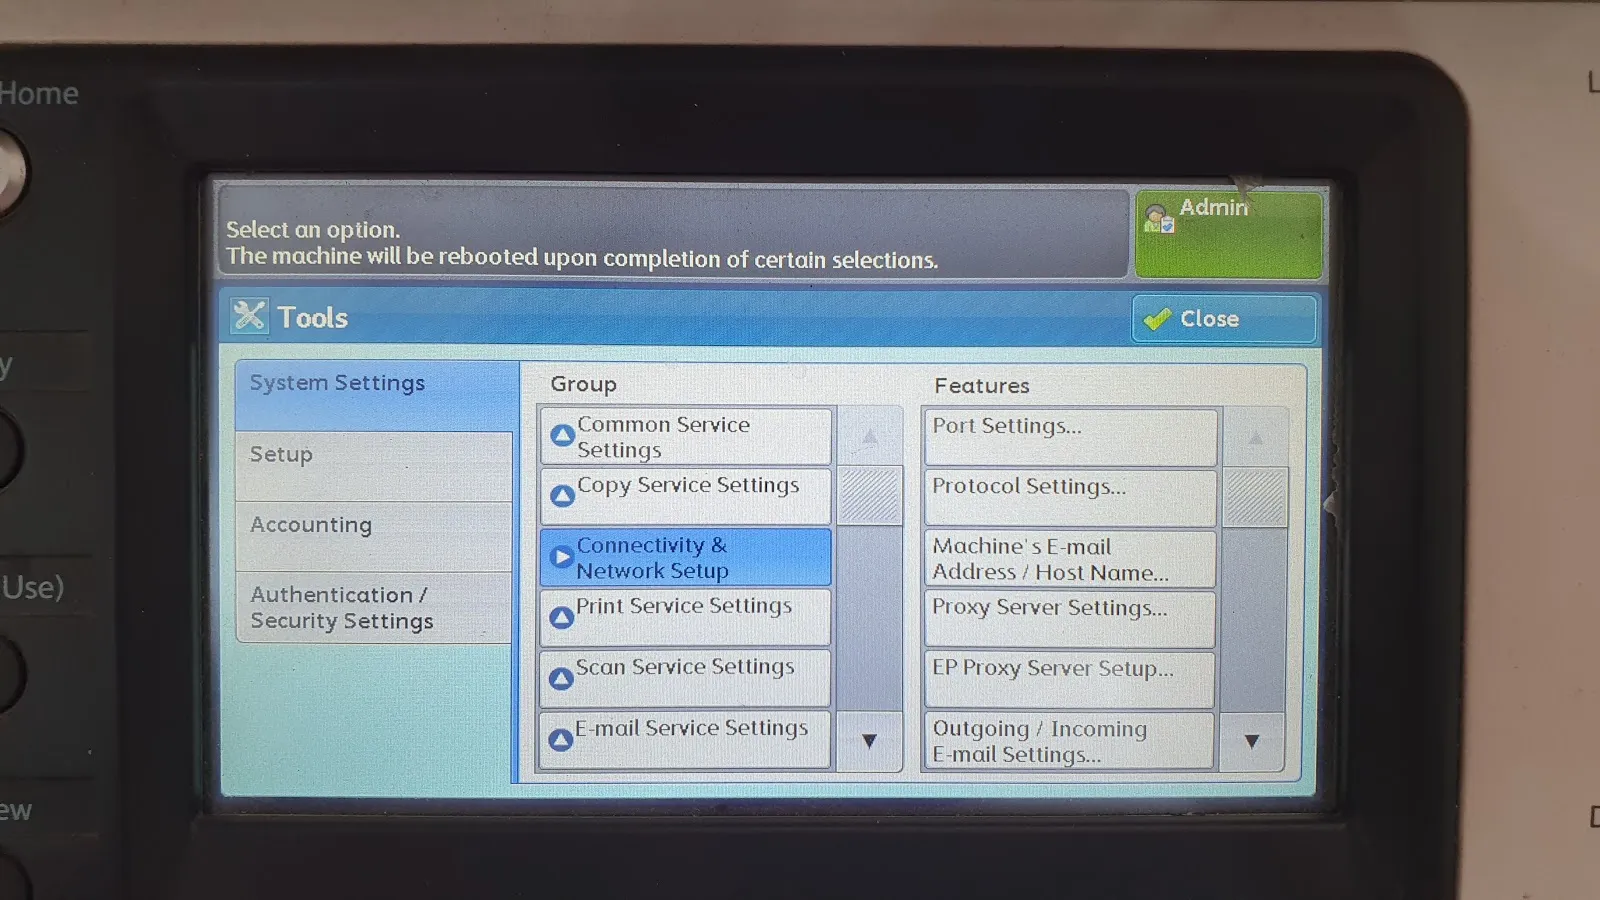
*Image: Control panel to access network settings.*
2. Find the **TCP/IP - Network Settings**.
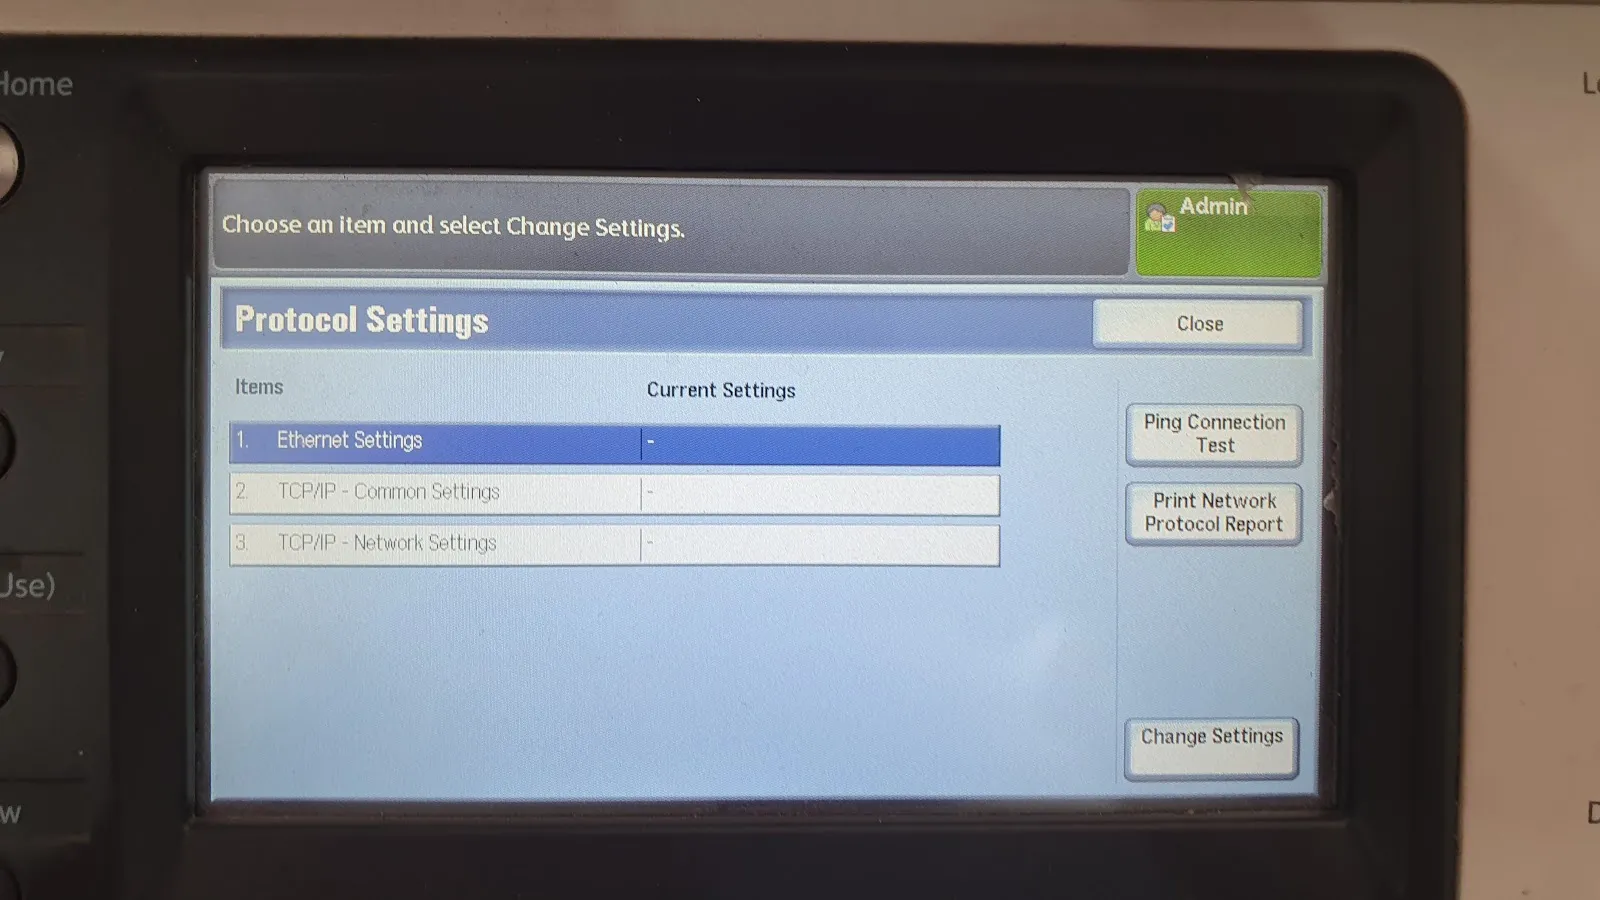
*Image: TCP/IP protocol settings option.*
3. Set a static IP address according to your network segment (e.g., `192.168.1.100`). **Write down this IP address**, as we will use it during the installation on the laptop.

*Image: Example of static IP configuration on the printer.*
---
## Step 3: Install the Driver on Windows
Now, we will connect your Windows laptop to the printer.
1. Open **Settings > Bluetooth & devices > Printers & scanners**.
2. Click the **Add device** button. Wait a moment until the option **"The printer that I want isn't listed"** appears, then click **Add manually**.
3. In the "Add Printer" window, select the option **"Add a printer using an IP address or hostname"** and click Next.
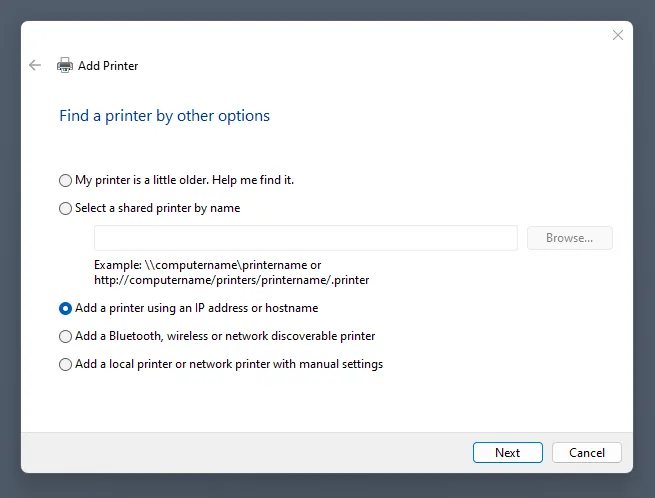
*Image: Choosing to add a printer via IP address.*
4. Change the "Device type" to **TCP/IP Device**. Enter the printer's IP address you noted earlier in the "Hostname or IP address" field. Let the "Port name" auto-populate. Click Next.
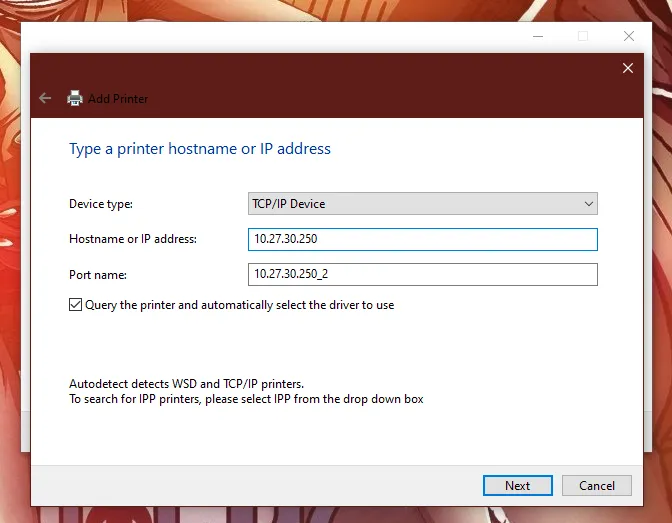
*Image: Entering the noted printer IP address.*
Can't Find the "TCP/IP Device" Option?
If the "TCP/IP Device" option does not appear, you may need to disable "Windows Protected Mode". To do this: open Control Panel > Internet Options > Security. Uncheck "Enable Protected Mode". Additionally, make sure the "Let Windows manage my default printer" option is enabled in the "Printers & scanners" settings.
5. In the next window, click the **"Have Disk..."** button.
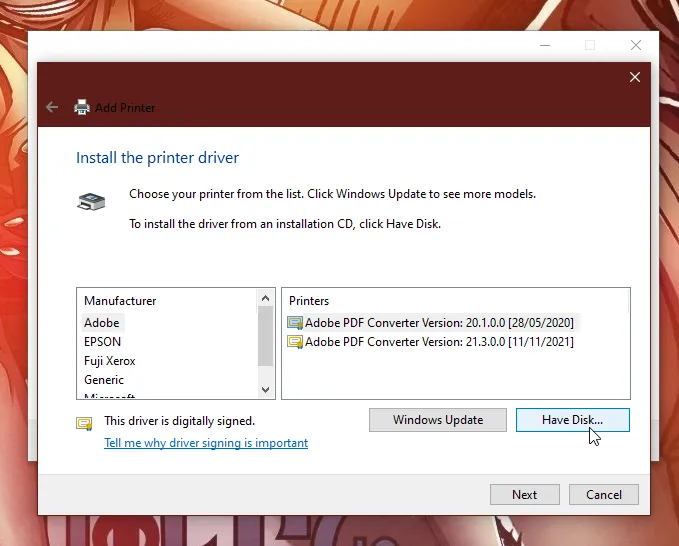
*Image: Using the 'Have Disk...' button for a manual driver.*
6. Click **"Browse..."** and navigate to the virtual drive (from mounting the `.iso` file). Find the appropriate `.inf` driver file (it's usually inside a folder for your operating system, e.g., `x64`). Click **Open**, then **OK**.
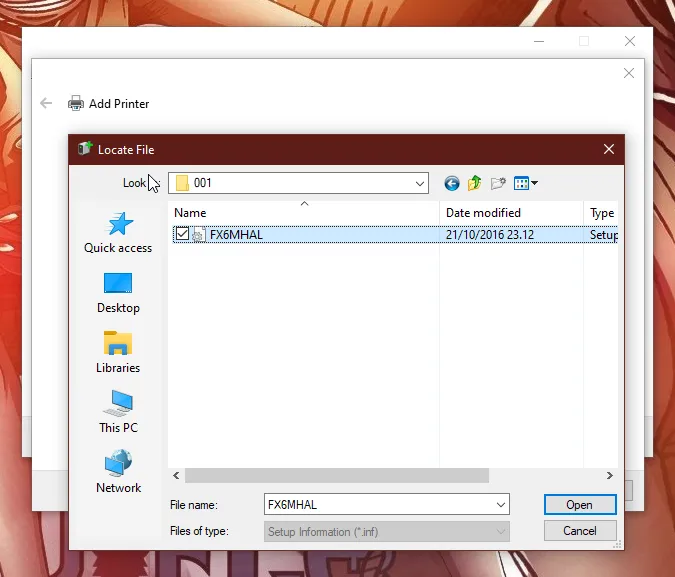
*Image: Selecting the `.inf` driver file manually.*
7. The system will display a list of compatible printers. Select the correct model, **"DocuCentre-V 2060 PCL 6"**, then click **Next**.
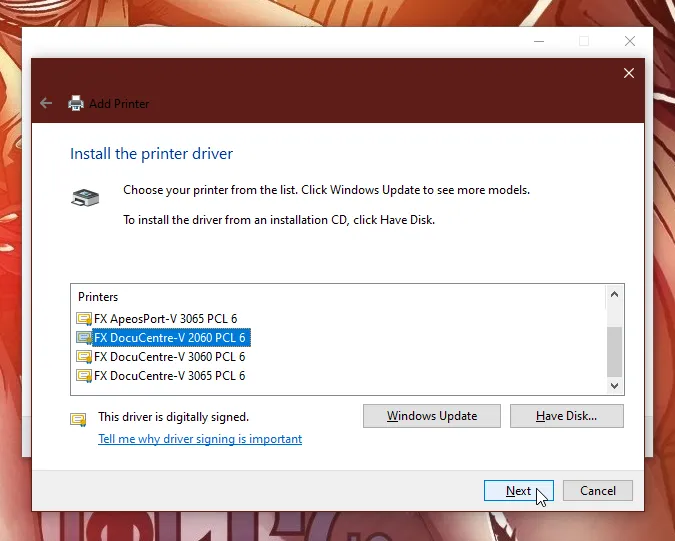
*Image: Selecting the appropriate printer model from the list.*
8. Follow the remaining instructions to complete the installation. You can print a test page to ensure the printer has been successfully installed.
That's the complete guide to installing the DocuCentre-V 2060 printer driver. Hopefully, this is helpful!