Antigravity 2.0 vs Antigravity IDE: How to Install on Linux
Iwan Efendi5 min
Learn the differences between Google Antigravity 2.0 and the IDE, and how to manually install both on CachyOS and other Linux distributions using tarballs.
Baca dalam IDID
After switching my daily driver PC to CachyOS last month, I felt it was finally time to install Google’s agent tools. I fired up the system, ready to grab the package, but immediately hit a roadblock that caught me completely off guard. It turns out Antigravity 2.0 and Antigravity IDE are not updates of the same app, but two entirely separate tools.
I spent a good half-hour looking at my terminal wondering if I had mistyped the install command. The official documentation did not make this distinction very clear at first glance, which left me scratching my head. To make matters more interesting, CachyOS does not have either app in its official repositories, and the community-maintained AUR package was lagging behind.
Since I could not rely on the package manager, I decided to go the manual route using official tarballs. I managed to get both running on my CachyOS setup with KDE Plasma, but the process had its share of quirks. If you are trying to set these up on Linux, here is how to get them running without losing your sanity.
Google announced Antigravity 2.0 at I/O 2026, and the name immediately caused some confusion. If you already read my post on trying out the Antigravity AI code editor, you might think this is just a major update. It is not; they serve completely different developer workflows.
Antigravity 2.0 is a standalone desktop application built entirely around parallel agent orchestration. It does not contain a code editor; instead, it is a dashboard where you manage autonomous agents running tasks in the background. It is designed for hands-off delegation, allowing agents to spawn subagents and handle multi-phase projects on their own.
On the other side, Antigravity IDE is the VS Code-fork you use for active, day-to-day coding. This is where you write and edit files yourself, using single-agent assistance in your active session. You can think of the IDE as your personal coding workspace, whereas Antigravity 2.0 is your autonomous agent manager.
Alongside the 2.0 release at Google I/O 2026, Google introduced the new Gemini 3.5 Flash model. This model is engineered specifically for fast, cost-efficient agentic and coding operations. I was surprised to find it performs four times faster than Gemini 3.1 Pro while beating it on most coding benchmarks.
The model features a massive 1 million token input context window paired with a 65,536 output token limit. This large capacity is exactly what allows Antigravity 2.0 to orchestrate complex projects without running out of memory. It makes long-running background tasks and complex subagent spawning actually practical.
If you are on an Arch-based system like CachyOS, you might expect the AUR package to work. However, when I ran the installation, the package failed because it was not updated for version 2.0.1. Official tarballs are the only way to get the latest features immediately, and thankfully Google provides stable Linux builds.
You can find the latest download links on the official releases page. Since the CDN links occasionally return 404 errors, I had to grab the URLs from the in-app update notification instead. Once you copy the correct links, the installation is straightforward.
Verify the download completed successfully. The file size should be slightly over 200MB:If this is a fresh install, create the symlink and a desktop entry manually so you can launch it from your desktop menu:
The installation of the IDE is very similar, but there is a major folder name catch. The extracted directory is named Confirm that the folder was created as Refresh your desktop application database to make the launcher recognize the new entry:
 If you are running KDE Plasma on Wayland and find that either app opens to a blank screen, you are likely hitting an Electron rendering bug. I had to manually append Wayland flags to the desktop files to force them to render window decorations properly. You can apply this patch directly using
Since we installed these via manual tarballs, you will need to handle future updates yourself. When a new version is released, download the fresh archive, delete the existing folder under
I think Google's decision to split Antigravity into two apps makes a lot of sense. Trying to cram full agent orchestration into an editor interface was always going to feel cluttered and heavy. By keeping them separate, you get a clean VS Code environment for direct coding, and a dedicated workspace for orchestrating background agents.
That said, the manual install process shows that Linux is still a secondary focus for the team. The space in the IDE's folder name and the lack of a maintained AUR package make the initial setup more annoying than it should be. But if you want to try the new Gemini 3.5 Flash capabilities, this manual route is well worth the effort.
If you are also testing Wayland setups, checking out how KDE Plasma per-screen virtual desktops work might help optimize your multi-monitor workflow. It complements the multi-agent setup of Antigravity 2.0 nicely when you have tasks running on one screen and code open on the other.
Are you planning to run the standalone Antigravity 2.0 agent dashboard, or are you sticking to the IDE? Let me know in the comments below.
If you are running KDE Plasma on Wayland and find that either app opens to a blank screen, you are likely hitting an Electron rendering bug. I had to manually append Wayland flags to the desktop files to force them to render window decorations properly. You can apply this patch directly using
Since we installed these via manual tarballs, you will need to handle future updates yourself. When a new version is released, download the fresh archive, delete the existing folder under
I think Google's decision to split Antigravity into two apps makes a lot of sense. Trying to cram full agent orchestration into an editor interface was always going to feel cluttered and heavy. By keeping them separate, you get a clean VS Code environment for direct coding, and a dedicated workspace for orchestrating background agents.
That said, the manual install process shows that Linux is still a secondary focus for the team. The space in the IDE's folder name and the lack of a maintained AUR package make the initial setup more annoying than it should be. But if you want to try the new Gemini 3.5 Flash capabilities, this manual route is well worth the effort.
If you are also testing Wayland setups, checking out how KDE Plasma per-screen virtual desktops work might help optimize your multi-monitor workflow. It complements the multi-agent setup of Antigravity 2.0 nicely when you have tasks running on one screen and code open on the other.
Are you planning to run the standalone Antigravity 2.0 agent dashboard, or are you sticking to the IDE? Let me know in the comments below.
Tested On
CachyOS with KDE Plasma, x86_64, glibc 2.43. Antigravity 2.0.1 + Antigravity IDE 2.0.1.
Antigravity 2.0 vs Antigravity IDE: What's the Difference?
The Gemini 3.5 Flash Upgrade
Why Choose the Manual Tarball Route?
Installing Antigravity 2.0
1
Download the tarball
First, download the official tarball from Google's public storage. Run this command in your terminal to save it to your downloads folder:cd ~/Downloads && \
curl -L "https://storage.googleapis.com/antigravity-public/antigravity-hub/2.0.1-6566078776737792/linux-x64/Antigravity.tar.gz" \
-o Antigravity-2.0.1.tar.gzls -lh ~/Downloads/Antigravity-2.0.1.tar.gz2
Extract to /opt
Extract the contents of the tarball directly into the/opt directory. This requires superuser privileges:sudo tar -xzf ~/Downloads/Antigravity-2.0.1.tar.gz -C /opt/3
Fix folder names and wrappers
The extracted folder is namedAntigravity-x64. If you had an older installation, the existing wrapper script at /usr/bin/antigravity might expect the binary under /opt/Antigravity/bin/. You will need to patch it:sudo sed -i 's|/opt/Antigravity/bin/antigravity|/opt/Antigravity-x64/antigravity|' /usr/bin/antigravitysudo ln -sf /opt/Antigravity-x64/antigravity /usr/local/bin/antigravity
sudo bash -c 'cat > /usr/share/applications/antigravity.desktop << EOF
[Desktop Entry]
Name=Antigravity
Exec=/opt/Antigravity-x64/antigravity %F
Icon=/opt/Antigravity-x64/resources/app/resources/linux/code.png
Type=Application
Categories=Development;IDE;
StartupNotify=true
EOF'4
Verify the installation
Verify that the terminal wrapper works and returns the correct version number:antigravity --version5
Clean up download files
Once everything is verified and running, remove the temporary tarball to save disk space:rm ~/Downloads/Antigravity-2.0.1.tar.gzInstalling Antigravity IDE
Antigravity IDE with a space. This space will prevent the application launcher from starting the editor unless you wrap the execution path in quotes.
1
Download the IDE tarball
Grab the IDE-specific tarball from the releases CDN. Run this command in your terminal:cd ~/Downloads && \
curl -L "https://edgedl.me.gvt1.com/edgedl/release2/j0qc3/antigravity/stable/2.0.1-4861014005645312/linux-x64/Antigravity%20IDE.tar.gz" \
-o AntigravityIDE-2.0.1.tar.gz2
Extract the archive
Extract the files to your/opt directory, matching the path we used for the agent hub:sudo tar -xzf ~/Downloads/AntigravityIDE-2.0.1.tar.gz -C /opt/Antigravity IDE by listing the directory contents:ls /opt/3
Create symlink and desktop shortcut
Because the folder name contains a space, you must wrap the execution command inside quotes in the desktop entry. Run these commands:sudo ln -sf "/opt/Antigravity IDE/antigravity-ide" /usr/local/bin/antigravity-ide
sudo bash -c 'cat > /usr/share/applications/antigravity-ide.desktop << EOF
[Desktop Entry]
Name=Antigravity IDE
Exec="/opt/Antigravity IDE/antigravity-ide" %F
Icon=/opt/Antigravity IDE/resources/app/resources/linux/code.png
Type=Application
Categories=Development;IDE;
StartupNotify=true
EOF'sudo update-desktop-database /usr/share/applications4
Verify the IDE launcher
Confirm the binary runs and outputs the version details:antigravity-ide --version5
Clean up archive files
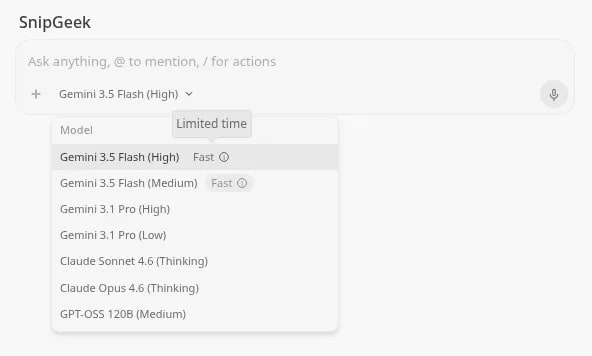
Remove the downloaded archive file from your downloads folder:rm ~/Downloads/AntigravityIDE-2.0.1.tar.gzZoom
Antigravity IDE 2.0.1 running on CachyOS, showing the new Gemini 3.5 Flash integration.
App Not Launching from Launcher?
If Antigravity IDE does not launch, check the quotes around the
Exec= path in your .desktop entry. Because the path /opt/Antigravity IDE/ contains a space, desktop environments like KDE will fail to parse it without quotes. The script above handles this, but a manual edit can accidentally remove them.Optional Wayland Fix
sed.
# Patch Antigravity 2.0
sudo sed -i 's|Exec=/opt/Antigravity-x64/antigravity %F|Exec=/opt/Antigravity-x64/antigravity --enable-features=WaylandWindowDecorations --ozone-platform=wayland %F|' /usr/share/applications/antigravity.desktop

# Patch Antigravity IDE
sudo sed -i 's|Exec="/opt/Antigravity IDE/antigravity-ide" %F|Exec="/opt/Antigravity IDE/antigravity-ide" --enable-features=WaylandWindowDecorations --ozone-platform=wayland %F|' /usr/share/applications/antigravity-ide.desktop
Future Updates
/opt, and extract the new files. Both apps will notify you in-app when updates are ready, which is how I spotted this release.
SnipGeek's Take
References
Topics
Topics in this article
Explore related topics and continue reading similar content.
Share this article
Discussion
Preparing the comments area...