How to Disable Windows Defender on Windows 11 Temporarily
Iwan Efendi3 min

A complete and safe guide to temporarily disabling Windows Defender on Windows 11 versions 22H2, 23H2, and 24H2, including how to add exclusions.
Baca dalam IDID
Microsoft Defender (formerly Windows Defender) is a robust, built-in antivirus solution that does an excellent job of keeping Windows 11 secure. However, there are specific situations where you might need to turn it off temporarily—such as when installing verified software developers' tools, running legacy scripts, or resolving false positive threat alerts during system testing.
In this guide, I will show you the correct and safe way to temporarily disable real-time protection in Windows 11, explain a much safer alternative (using folder exclusions), and walk you through troubleshooting steps if something goes wrong.
Before turning off the entire real-time scanning engine, consider adding a specific file or folder to the exclusion list. This keeps the rest of your computer protected while allowing your specific application to run without interference.
If an exclusion is not enough and you must shut down the main scanning engine, follow these steps.
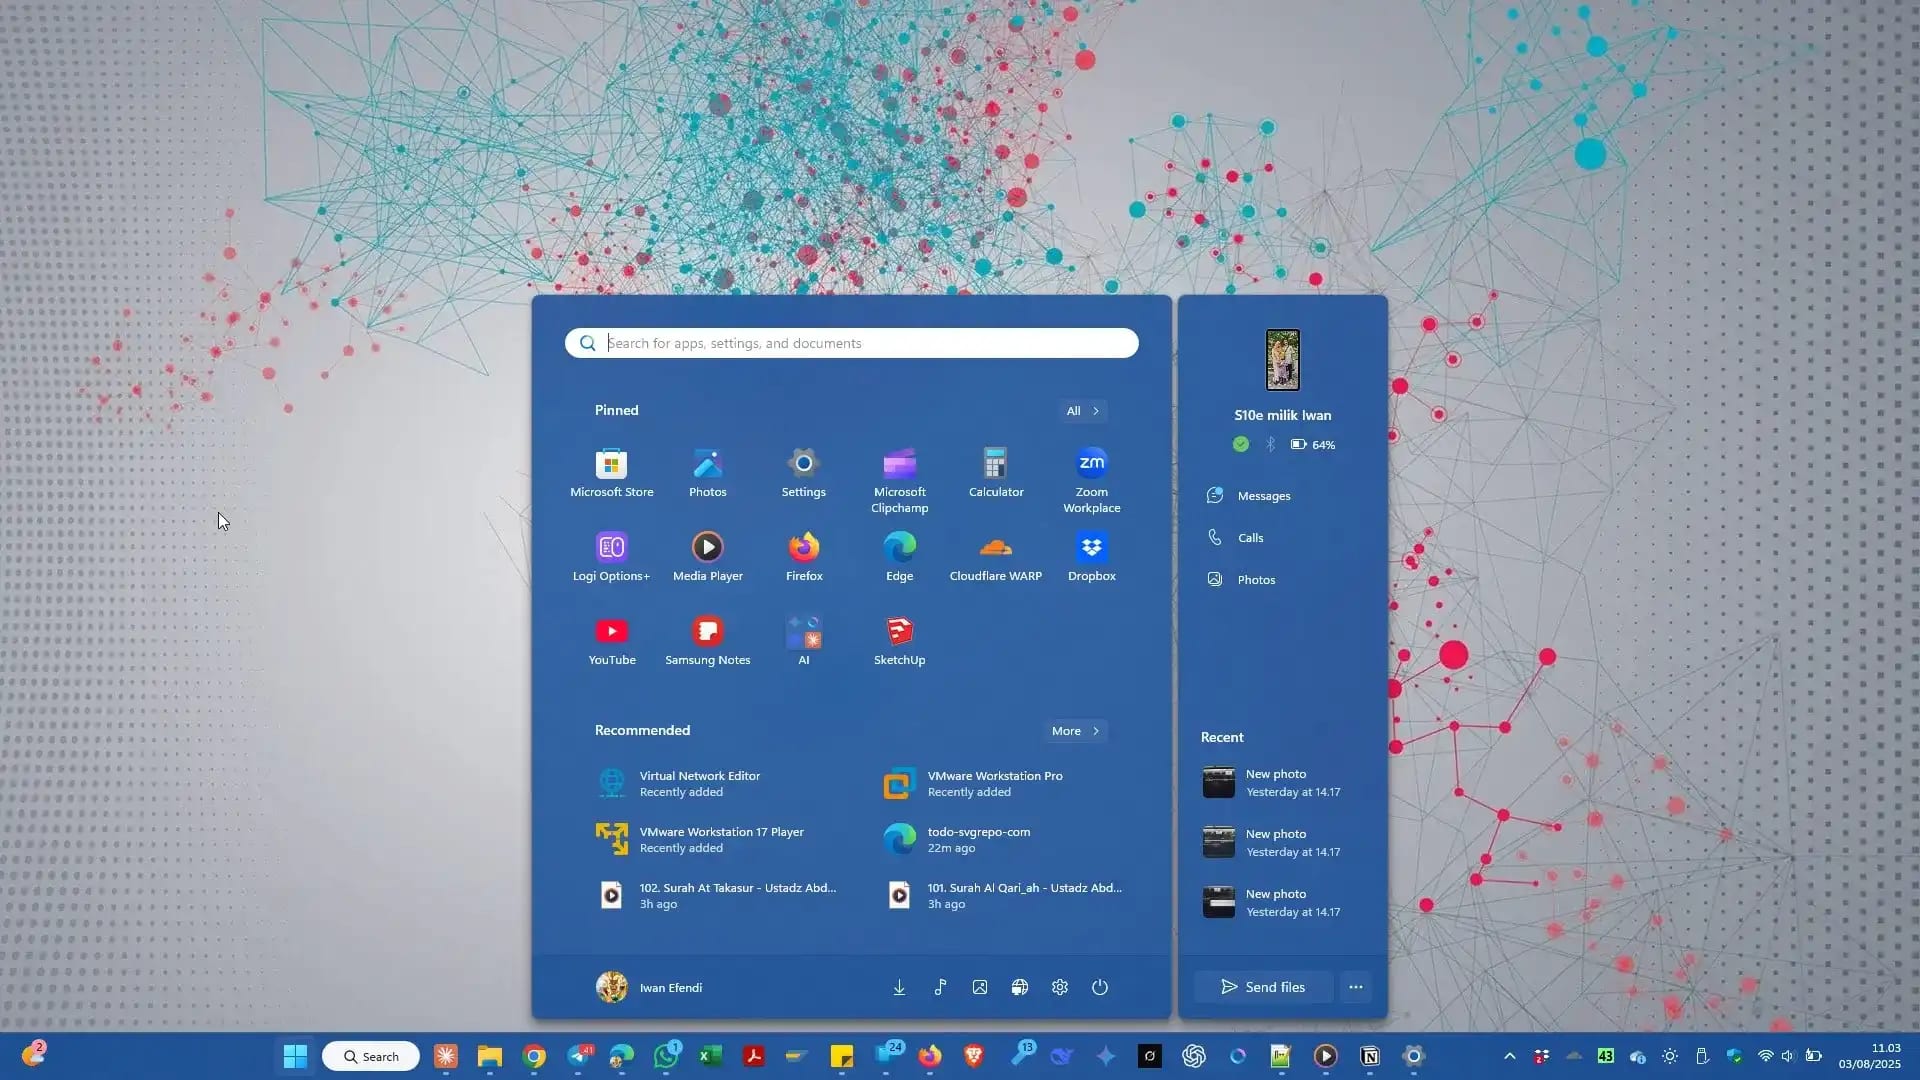
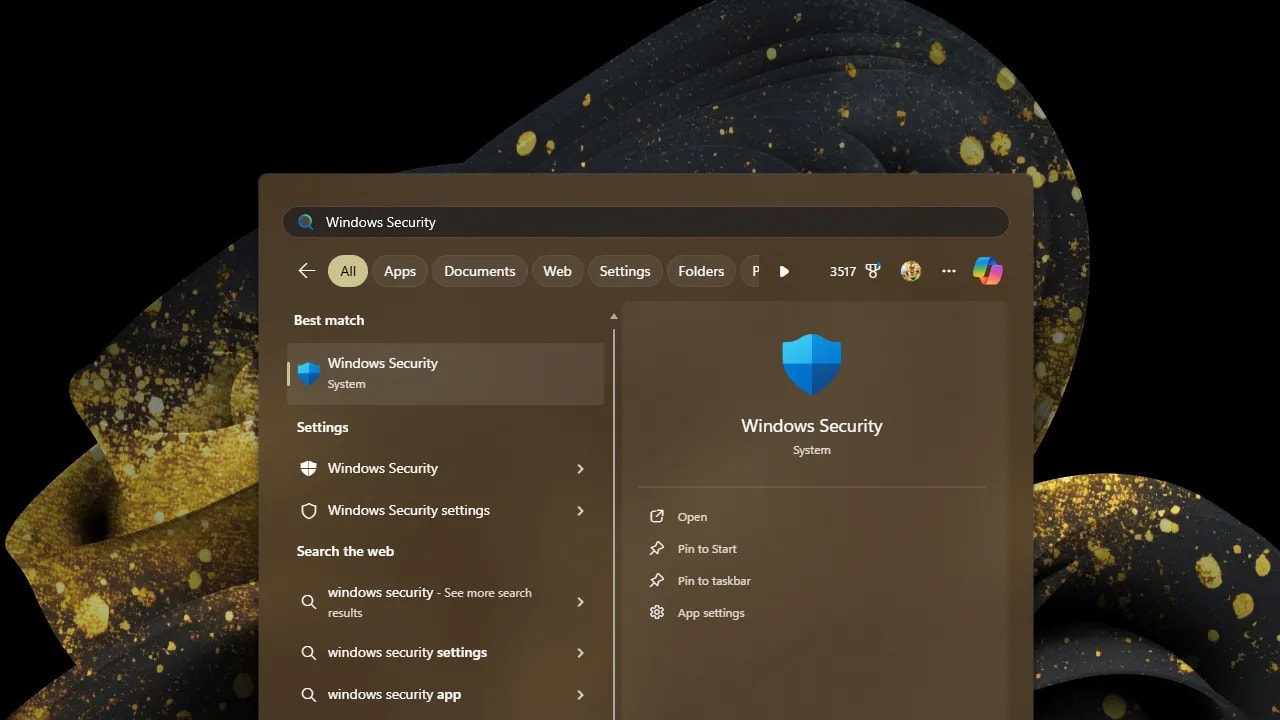 Opening the Windows Security app from the Start menu.
 Windows Security dashboard with the 'Virus & threat protection' menu highlighted.
 The 'Manage settings' link under the 'Virus & threat protection settings' section.
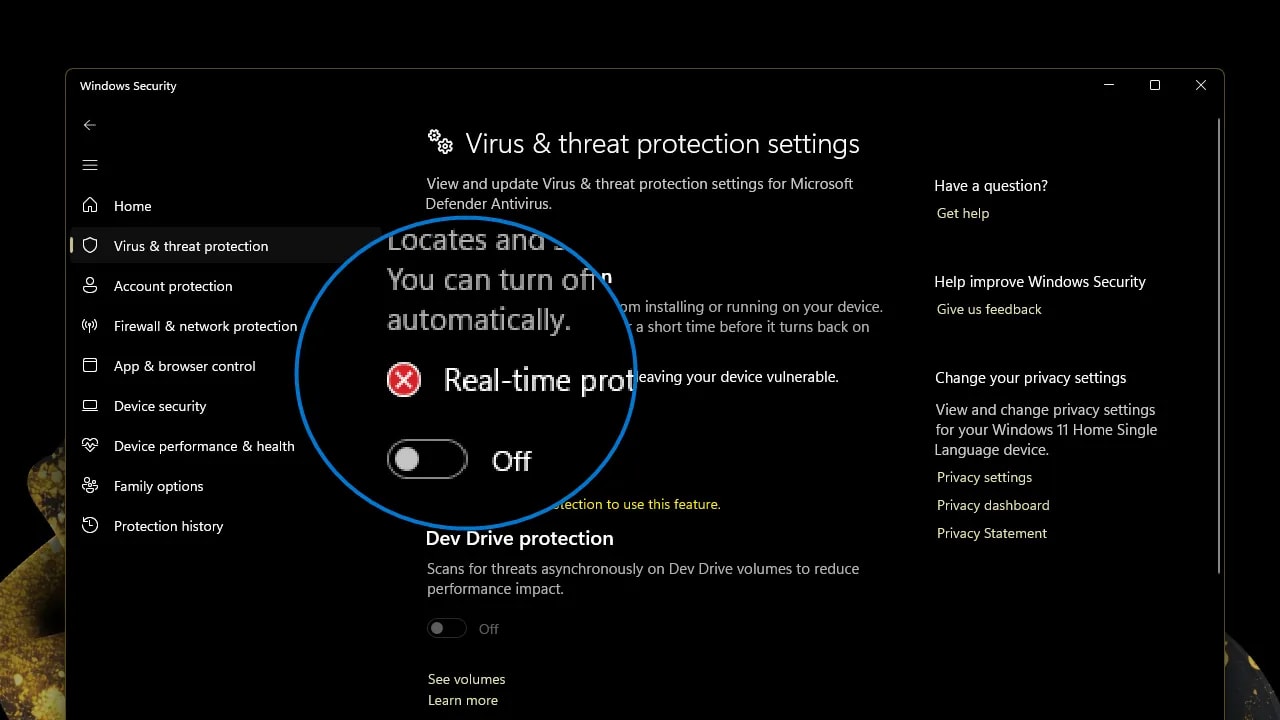
 The 'Real-time protection' switch in the Off position.
Once disabled, Windows will show notifications warning you that your device is unprotected. The taskbar shield icon will display a yellow warning triangle.
The 'Real-time protection' switch in the Off position.
Once disabled, Windows will show notifications warning you that your device is unprotected. The taskbar shield icon will display a yellow warning triangle.
Windows 11 is designed to automatically re-enable real-time protection after a period of inactivity or upon restarting your PC. However, you should not wait for the system to do it.
To turn it back on manually:
Important: Safety First and Understand the Risks!
Critical Security Warning
Disabling your antivirus, even for a few minutes, leaves your system completely exposed to malware, ransomware, and drive-by downloads.
- Never disable Defender to install cracked software, keys, or active keygens. These are almost always bundled with malware.
- Only disable protection for files and tools you have verified as safe (e.g., by scanning them with VirusTotal or verifying the digital signature of the publisher).
- Immediately re-enable protection as soon as your task is complete.
The Safer Route: Add an Exclusion Instead
How to Add a Folder Exclusion
1
Open Windows Security settings
Click the Start menu, type
Windows Security, and select the app.2
Navigate to Exclusion settings
Go to Virus & threat protection, click Manage settings under the Virus & threat protection settings header, scroll down to the Exclusions section, and click Add or remove exclusions.
3
Select file or folder
Click Add an exclusion and choose whether you want to exclude a specific file, folder, file type, or process.
4
Confirm UAC prompt
Click Yes on the User Account Control pop-up to apply the change.
Guide to Temporarily Disabling Real-Time Protection
Step 1: Open Windows Security
Press the Win key, typeWindows Security, and press Enter to launch the dashboard.
Zoom
Step 2: Go to Virus & Threat Protection Settings
From the dashboard homepage, click on the Virus & threat protection option.Zoom
Step 3: Access Settings Management
Scroll down to the Virus & threat protection settings header and click on Manage settings.Zoom
Step 4: Toggle Real-Time Protection Off
Toggle the switch under Real-time protection from On to Off. Click Yes on the User Account Control (UAC) prompt to authorize the change.Zoom
How to Restore Antivirus Protection
- Return to the Manage settings page in Windows Security.
- Toggle the Real-time protection switch back to On.
- Verify that the shield icon in the taskbar returns to a green checkmark state.
FAQ
Will Windows Defender turn back on automatically?
Yes. To prevent permanent exposure, Windows automatically re-enables Real-time protection after a brief period (usually after a system restart or a few hours). If you need it disabled longer, you must manually toggle it off again or configure exclusions.What is a false positive?
A false positive occurs when your antivirus mistakenly identifies a safe, benign file as malware because its behavior or code pattern resembles known threats. This is common with custom scripts, system repair tools, and developer compilers.How do I know if a file is safe before disabling protection?
Upload the file to VirusTotal to scan it with dozens of antivirus engines simultaneously. Additionally, check the publisher's digital signature by right-clicking the file, selecting Properties, and looking for the Digital Signatures tab.Why is the toggle grayed out or unavailable?
If you cannot toggle Real-time protection, you are either logged into a standard user account without Administrator privileges, or your PC is managed by an organization (school/work) that enforces security policies via Group Policy.n.Topics
Topics in this article
Explore related topics and continue reading similar content.
Share this article
Discussion
Preparing the comments area...