How to Install Fuji Xerox DocuCentre-V 2060 Driver
Iwan Efendi5 min

A complete guide to installing and configuring the Fuji Xerox DocuCentre-V 2060 printer driver on a Windows network.
Baca dalam IDID
Installing a multifunction printer like the Fuji Xerox DocuCentre-V 2060 on an office network can sometimes be a challenge, especially in ensuring a smooth connection between the laptop and the printer. This guide will walk you through every step, from downloading the driver to IP configuration, to get your printer ready to use.
The first step is to ensure you have the right driver file. We have provided the PCL 6 driver, which is the most common and compatible driver for most printing needs.
To ensure your laptop can always find the printer on the network, it's important to set a static IP address on the printer.
Now, we will connect your Windows laptop to the printer.
If things don't go smoothly on the first try, here are the most common issues:
Step 1: Download the Correct Driver
Important: We have provided the driver file in .iso format below to make it easy for you to follow this tutorial. However, as a best security practice, we highly recommend always downloading drivers directly from the manufacturer's official website whenever possible.
Fuji Xerox DocuCentre-V 2060 PCL 6 Driver13.5 MBDownload
After the file is downloaded, right-click the .iso file and select Mount. This will create a virtual drive in File Explorer containing the installation files.
Step 2: Configure a Static IP on the Printer
-
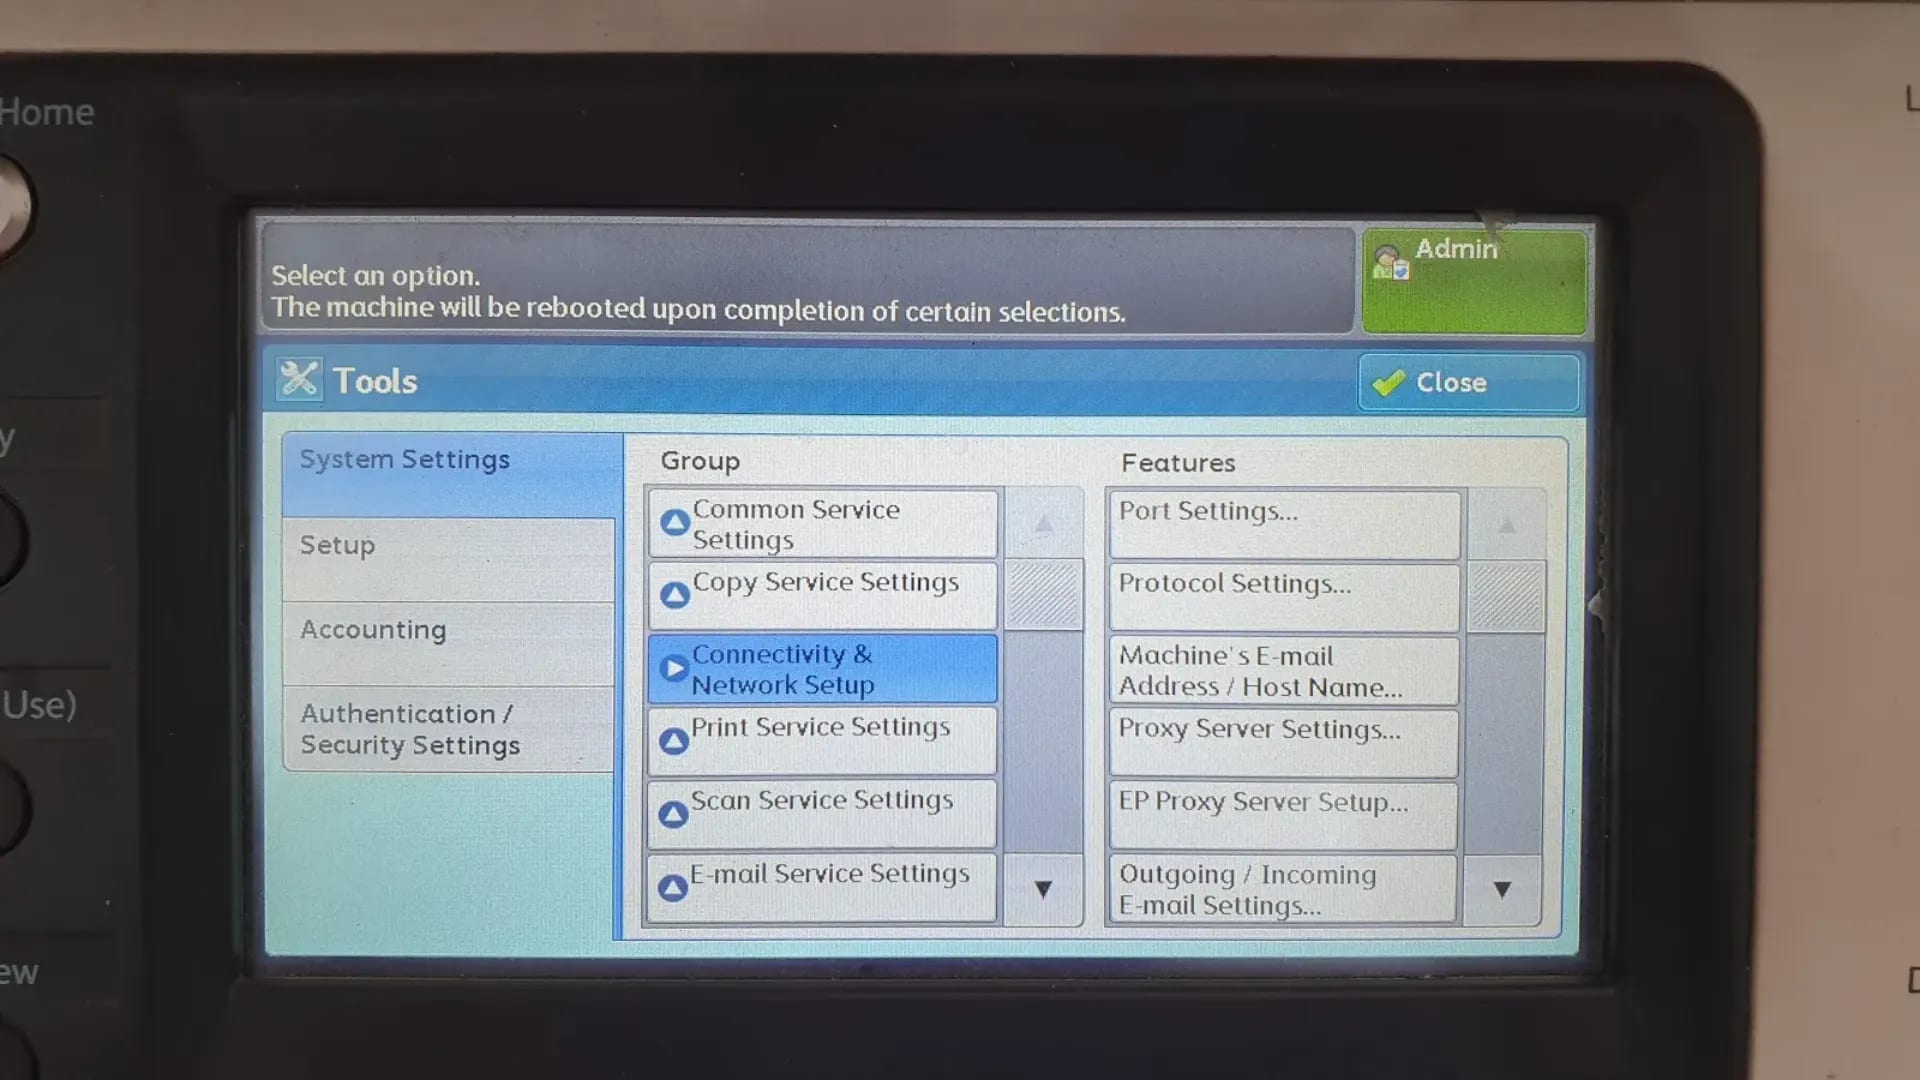
Access the admin menu on the printer and navigate to the network settings. This is usually under the Connectivity & Network Setup > Protocol Settings menu.
Image: Control panel to access network settings.
 Zoom
Zoom -
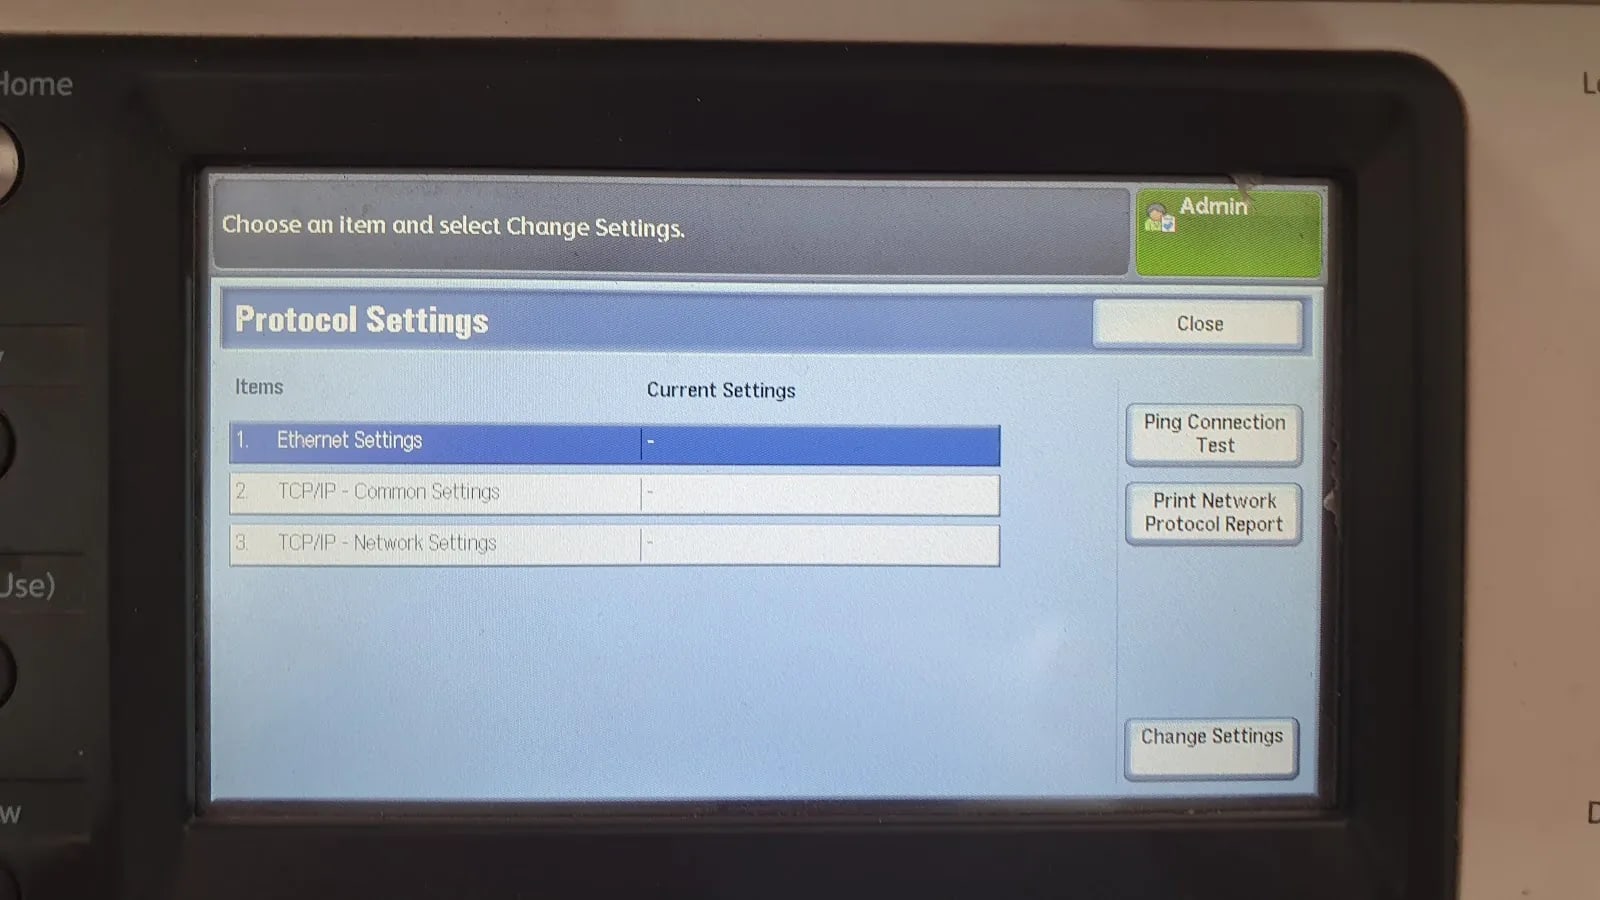
Find the TCP/IP - Network Settings.
Image: TCP/IP protocol settings option.
 Zoom
Zoom -
Set a static IP address according to your network segment (e.g.,
192.168.1.100). Write down this IP address, as we will use it during the installation on the laptop.Image: Example of static IP configuration on the printer.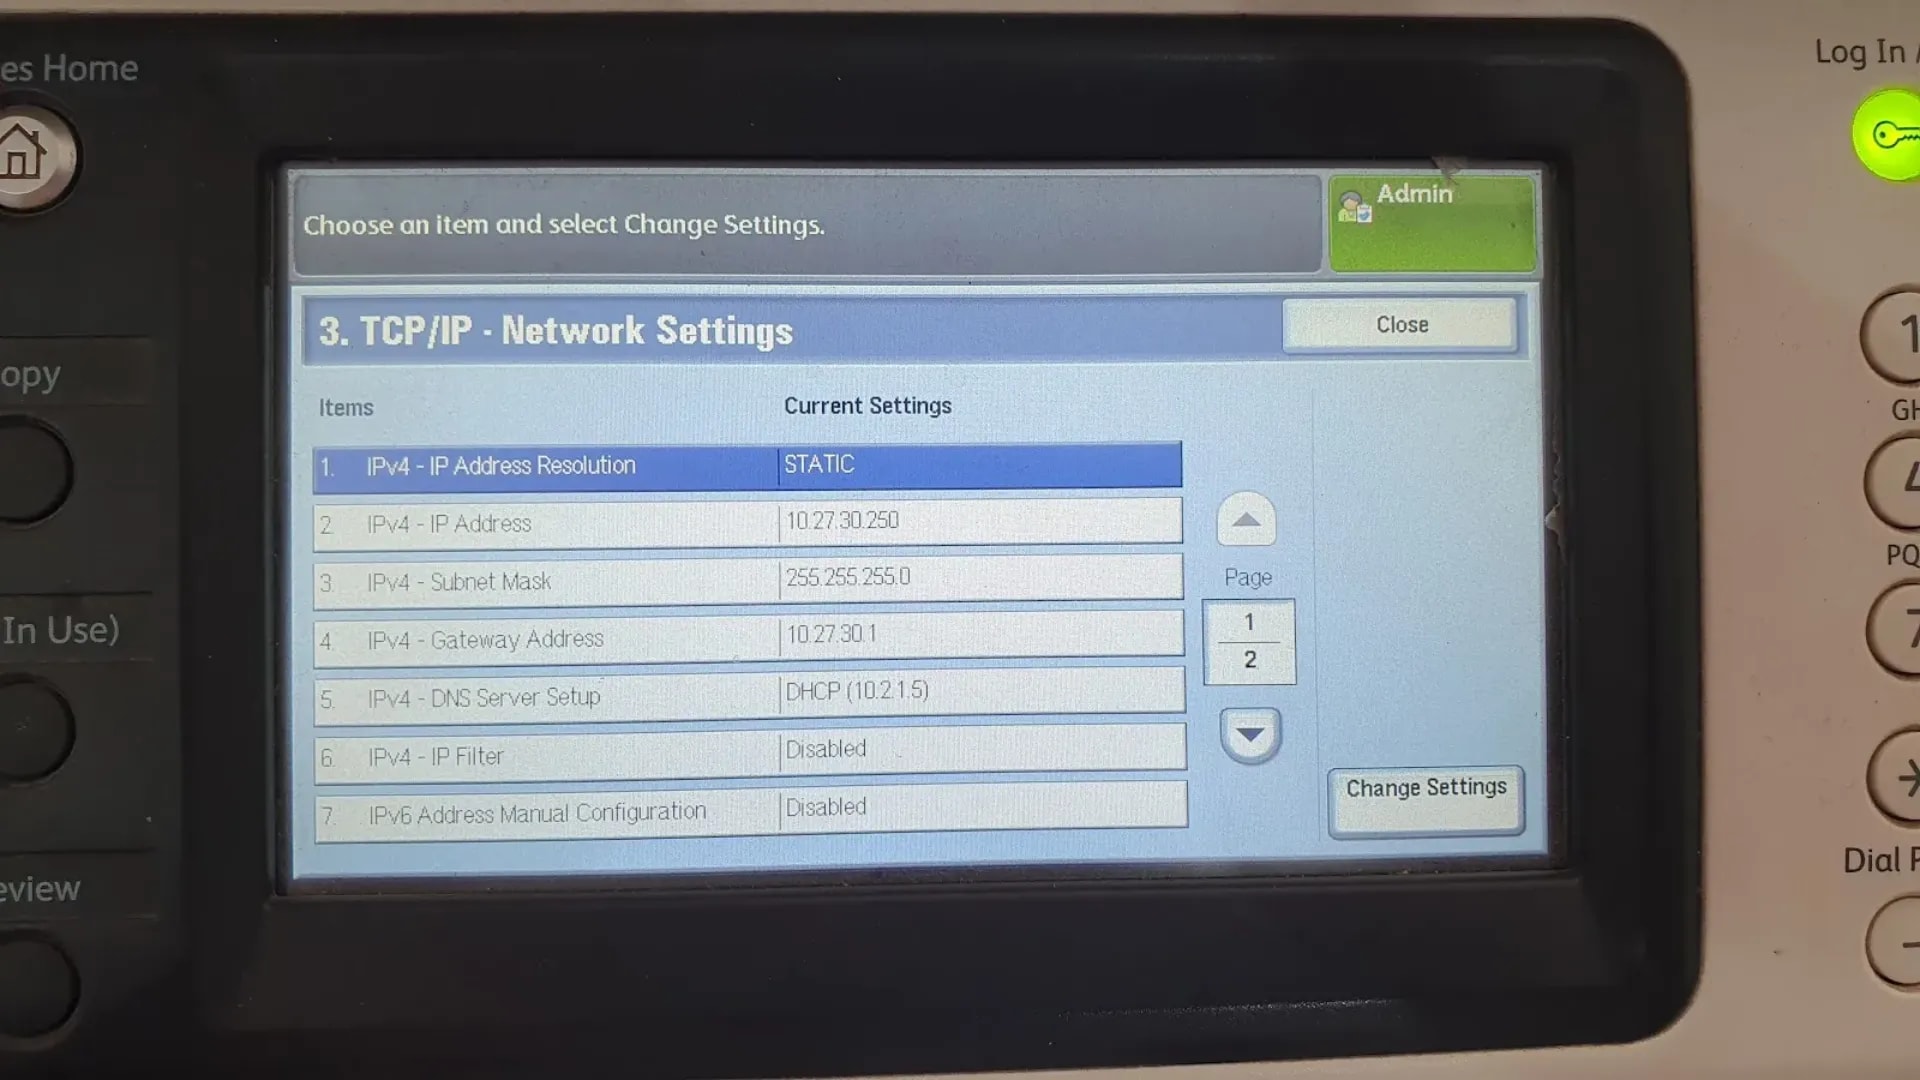 Zoom
Zoom
Step 3: Install the Driver on Windows
- Open Settings > Bluetooth & devices > Printers & scanners.
- Click the Add device button. Wait a moment until the option "The printer that I want isn't listed" appears, then click Add manually.
-
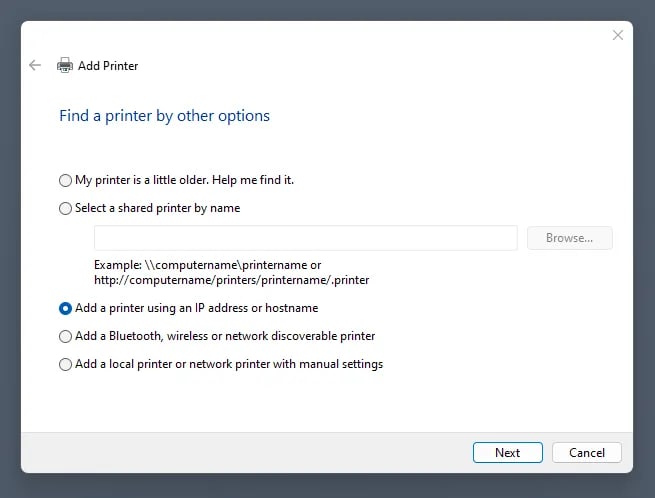
In the "Add Printer" window, select the option "Add a printer using an IP address or hostname" and click Next.
Image: Choosing to add a printer via IP address.
 Zoom
Zoom -
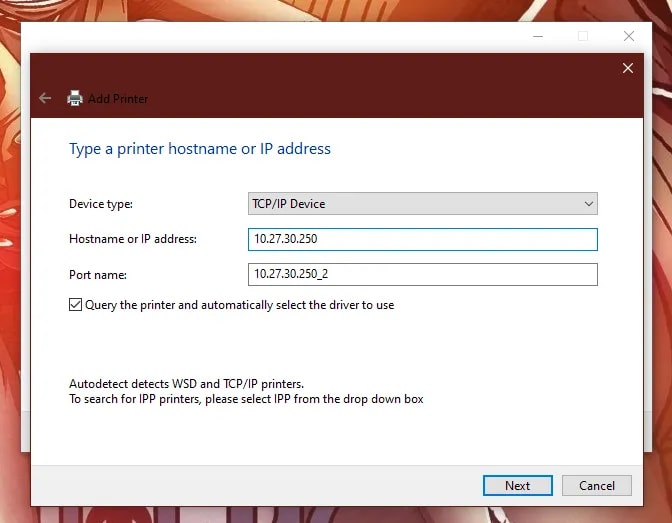
Change the "Device type" to TCP/IP Device. Enter the printer's IP address you noted earlier in the "Hostname or IP address" field. Let the "Port name" auto-populate. Click Next.
Image: Entering the noted printer IP address.
 Zoom
Zoom
Can't Find the "TCP/IP Device" Option?
If the "TCP/IP Device" option does not appear, you may need to disable "Windows Protected Mode". To do this: open Control Panel > Internet Options > Security. Uncheck "Enable Protected Mode". Additionally, make sure the "Let Windows manage my default printer" option is enabled in the "Printers & scanners" settings.
-
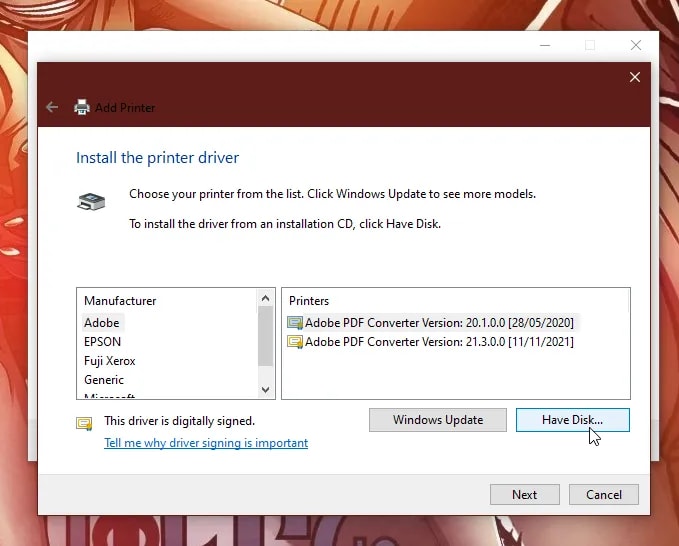
In the next window, click the "Have Disk..." button.
Image: Using the 'Have Disk...' button for a manual driver.
 Zoom
Zoom -
Click "Browse..." and navigate to the virtual drive (from mounting the
.isofile). Find the appropriate.infdriver file (it's usually inside a folder for your operating system, e.g.,x64). Click Open, then OK.Image: Selecting the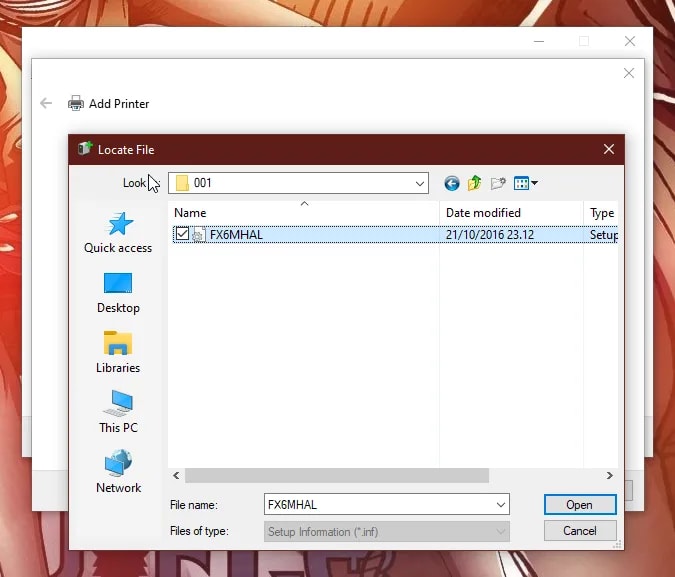 Zoom
Zoom.infdriver file manually. -
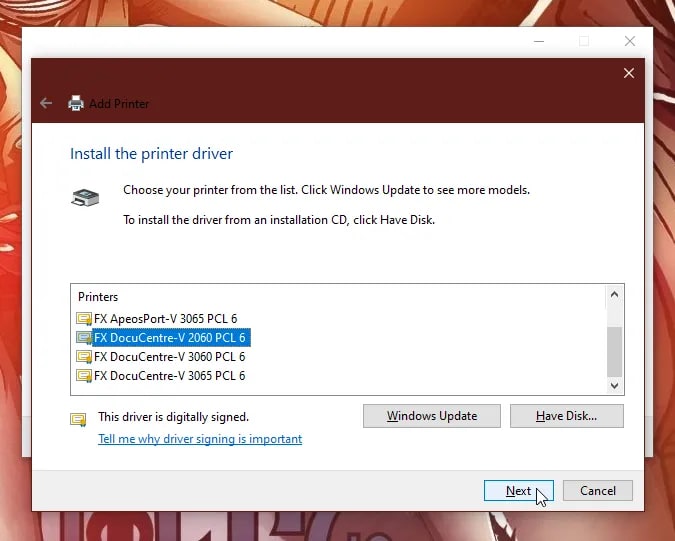
The system will display a list of compatible printers. Select the correct model, "DocuCentre-V 2060 PCL 6", then click Next.
Image: Selecting the appropriate printer model from the list.
 Zoom
Zoom - Follow the remaining instructions to complete the installation. You can print a test page to ensure the printer has been successfully installed.
Troubleshooting
- Printer not detected during Add Printer: Double-check that both your laptop and the printer are on the same network subnet. Try pinging the printer IP from Command Prompt (
ping 192.168.1.100). - "Access Denied" when printing: The printer may require authentication. Check with your IT admin whether SNMP or a specific user account is needed.
- Driver install fails on Windows 11 24H2+: Some older Fuji Xerox
.inffiles trigger SmartScreen warnings. Right-click the.inf→ Properties → check "Unblock" before installing. - Print jobs stuck in queue: Restart the Print Spooler service — open Command Prompt as admin and run
net stop spooler && net start spooler.
FAQ
Is the PCL 6 driver the right one for my needs?
Yes, for most users. PCL 6 handles standard office documents — Word, Excel, PDFs — efficiently. Only switch to PostScript if you work with complex vector graphics or specialized publishing software.Does this guide work on Windows 10?
Yes. The Add Printer wizard and TCP/IP setup are nearly identical on Windows 10 and Windows 11. The only difference is the Settings path: on Windows 10 it's under Devices > Printers & scanners.Can I install this driver without an .iso file?
Absolutely. If you download the driver directly from the Fuji Xerox / FUJIFILM website, it typically comes as a.zip or self-extracting .exe. Extract it to a folder, then point the "Have Disk" dialog to that folder instead of the virtual drive.
What if the printer uses DHCP and the IP keeps changing?
Set a DHCP reservation on your router for the printer's MAC address. That way the printer always gets the same IP without needing manual static configuration on the printer itself.References
Topics
Topics in this article
Explore related topics and continue reading similar content.
Share this article
Discussion
Preparing the comments area...


